Let’s face it—our cars go through a lot. Rain, sun, road grime, tree sap, and even bird poop. All these elements can dull your car’s paint and make it look tired. That’s where polishing comes in. Polishing is like giving your car a mini facial. It helps eliminate light scratches, swirls, and oxidation, restoring that showroom shine. Today, we’re diving into the step-by-step process of polishing your car using 3D One polish, a fan-favorite among detailers.
Why Choose 3D One Polish?
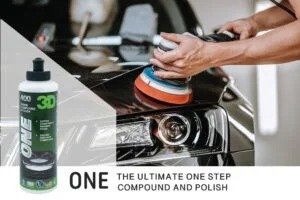
What Makes 3D One Unique
3D One isn’t just another polish—it’s a hybrid compound and polish in one. That means it has the power to cut through imperfections and still finish off with a glossy shine, all without switching products.
Benefits of Using 3D One
● Cuts and finishes in one step
● Works well on all paint types
● Dust-free application
● Safe for beginners and pros
● Saves time and effort
Tools and Materials You’ll Need
Before jumping in, gather everything you need. Trust me—there’s nothing worse than scrambling for a microfiber towel mid-polish.
Essential Products
● 3D One Polish
● Dual Action (DA) Polisher or Rotary Polisher
● Foam cutting and polishing pads
● Microfiber towels
● IPA spray or panel wipe
Optional But Helpful Tools
● Pad cleaning brush
● Clay bar kit
● Masking tape
● Paint depth gauge
Prepping Your Car for Polish
Polishing without proper prep is like painting over dirt—it just won’t work. So, let’s prep that ride.
Step 1: Thorough Wash
Start with a two-bucket wash to safely remove dirt and grime. Use a high-quality pH-balanced car shampoo.
Step 2: Clay Bar Treatment
Use a clay bar or clay mitt with lubricant to remove bonded contaminants that washing can’t eliminate. Your paint should feel smooth as glass when you’re done.
Step 3: Tape Off Sensitive Areas
Apply masking tape to trim, rubber seals, and emblems. This avoids accidental polish splatter and helps you stay focused on the paintwork.
Step-by-Step Polishing with 3D One
Now for the main event—polishing your car with 3D One. Follow these steps, and your paint will thank you.
Step 4: Prime the Pad
Apply a few small dots of 3D One onto your pad. If it’s a fresh pad, spread the product evenly to “prime” it before polishing.
How Much Product to Use
Less is more. About 4 pea-sized drops are enough for a 2’x2’ section. Overloading the pad leads to gumming and poor results.
Step 5: Work in Sections
Break your car down into manageable sections—like the hood, door panels, roof, etc.
The Crosshatch Technique Explained
Apply the polisher to the paint and start at low speed. Move it in horizontal lines, then vertical lines, creating a “crosshatch” pattern. This ensures even coverage and effective correction.
Step 6: Check Your Work
After polishing a section, wipe off the residue with a clean microfiber towel. Check the results under proper lighting.
Step 7: Wipe Down and Inspect
Once the whole car is done, use an IPA spray or panel wipe to remove any leftover oils and inspect your work. You’ll see the true finish.
Pro Tips for a Perfect Finish
Even if you’re not a pro detailer, these tips will make you look like one.
Avoiding Holograms and Swirls
Use the right pad for the job. Cutting pads for defects, polishing pads for refining. Don’t use too much pressure let the machine do the work.
Working Under Proper Lighting
Sunlight is great, but LED lights or a swirl finder light help spot imperfections you might miss.
When to Use a Cutting Pad vs Polishing Pad
It all depends on what you’re correcting.
Light Defects vs Heavy Defects
● Light defects? Use a soft polishing pad.
● Heavy swirls or oxidation? Go with a firmer cutting pad.
You can even start with a cutting pad, then do a final pass with a polishing pad for that deep, wet gloss.
Aftercare and Protection
Now that your paint is smooth and shiny, let’s keep it that way.
Sealants or Waxes?
Apply a paint sealant or ceramic coating to lock in the shine. Waxes are great too, but they don’t last as long.
Maintenance Tips
● Wash with pH-neutral shampoos
● Use microfiber towels only
● Avoid automatic car washes
Common Mistakes to Avoid
Here’s what not to do when using 3D One polish.
Skipping Surface Prep
Never polish on a dirty or contaminated surface. It’ll cause micro-marring and more harm than good.
Using Too Much Pressure
Pressing hard doesn’t mean better results. In fact, it can damage the paint and overheat the pad.
Final Thoughts
Polishing your car with 3D One isn’t rocket science—but it is an art. With the right tools, proper prep, and a little patience, you can bring your paint back to life and make your car look like a million bucks. Whether you’re prepping for a car show or just love that mirror finish, this guide has got you covered. Now grab that polisher and let your car’s paint speak for itself!
FAQs
1. Can I use 3D One polish by hand?
Yes, but results will be limited. For best correction and gloss, use a dual-action polisher.
2. Is 3D One safe for all paint types?
Absolutely! It’s safe for clear coats, single-stage paint, and even delicate finishes like black or red.
3. How often should I polish my car?
2–3 times a year is plenty. Over-polishing can wear down a clear coat.
4. What pad works best with 3D One?
Use a cutting pad for defects, and a polishing pad for refining. Foam and microfiber pads both work well.
5. Can I apply wax or ceramic after using 3D One?
Yes! In fact, you should. Sealing the paint protects your hard work and enhances shine.