So, you’ve washed your car under the sunlight and noticed those tiny spider-web-like scratches dancing on your paint? Yep, those are swirl marks—and they can be a real mood killer for car lovers. The good news? You can remove them. Better news? You can prevent them too. Let’s dive deep into the swirl world and learn how to fix them once and for all.
What Are Swirl Marks, Really?
Swirl marks are super-fine scratches in your car’s clear coat. They’re usually circular in pattern and show up best under direct light—think showroom lighting or bright sunlight.
Why Do Swirl Marks Appear?
These aren’t some mystical car curse. Swirl marks happen when abrasive dirt or poor washing techniques scratch the clear coat. Even something as innocent as a dry towel can be the culprit.
Common Causes of Swirl Marks
● Using dirty or rough cloths
● Automatic car washes with hard brushes
● Dry wiping dust off the surface
● Improper drying methods
● Circular motion washing with dirty mitts
Can You Prevent Swirl Marks? Absolutely
Why fix something if you can avoid it in the first place?
Smart Washing Techniques
Always use the two-bucket method: one for soapy water, one for rinsing your mitt. It’s the golden rule for a scratch-free wash. Use a microfiber wash mitt, and NEVER skip rinsing it after each panel.
Products That Actually Help
● pH-neutral car shampoo
● Grit guards in buckets
● Drying towels (not chamois!)
● Foam cannon for pre-wash
How to Check for Swirl Marks (Even the Hidden Ones)
Sometimes swirl marks play hide and seek. Here’s how to catch them red-handed.
Lighting Tricks and Inspection Tips
Grab a strong LED light or use your smartphone’s flashlight. Shine it directly at the paint from an angle. Move the light around and watch for the telltale swirls. Garage inspection lights work best, but even your phone can do wonders.
Tools You’ll Need to Remove Swirl Marks
Removing swirls isn’t rocket science—but you need the right gear.
Must-Have Products
● Clay bar
● Dual action (DA) polisher
● Microfiber towels
● Swirl remover polish
● Foam or microfiber cutting pads
Optional But Useful Tools
● Paint depth gauge
● IPA (Isopropyl alcohol) for panel wipe-down
● Paint sealant or ceramic coating
Step-by-Step Guide: Removing Swirl Marks Like a Pro
Let’s get to the meat of the job. Time to roll up your sleeves.
Step 1: Thorough Wash
Clean the car properly using a pH-balanced shampoo and the two-bucket method. Rinse thoroughly and dry using a plush microfiber towel.
Step 2: Paint Decontamination (Clay Bar)
Even if your car looks clean, contaminants hide in the paint. Rub a lubricated clay bar gently over the surface to remove bonded dirt. The smoother the paint, the better the polishing.
Step 3: Test Spot First
Don’t start polishing the whole car immediately. Pick a small area—like a door bottom—and test your combo of pad and polish. If it works, you’re good to go.
Step 4: Polish Like a Pro
Use a DA polisher for best results. Apply 3–4 pea-sized drops of polish on your pad, spread it on a 2×2 ft section, and work in overlapping passes.
Hand Polishing vs Machine Polishing Hand polishing is fine for minor defects, but for noticeable swirls, a machine gives better, faster, and more even results. DA polishers are safe for beginners too.
Step 5: Seal the Deal with a Wax or Sealant
After polishing, your paint is vulnerable. Seal it with a quality wax, sealant, or ceramic coating to protect your hard work.
Best Polishing Products for Swirl Marks
Tired of all the brand noise? Here’s what actually works.
Budget Picks That Work
● Meguiar’s Ultimate Compound
● Turtle Wax Hybrid Solutions Swirl Remover
● Chemical Guys VSS Scratch & Swirl Remover
Premium Products Worth the Splurge
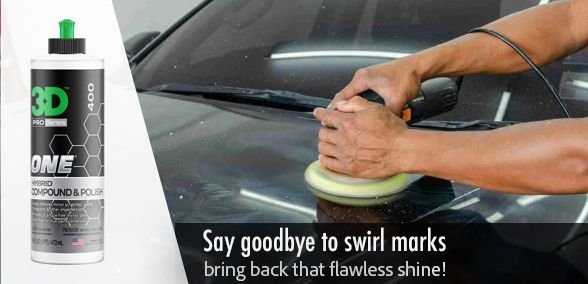
● 3D One Hybrid Compound & Polish
● Menzerna 3500
● Rupes Uno Protect
Aftercare Tips to Keep Your Car Swirl-Free
Swirl removal isn’t a one-time job—it’s a lifestyle.
Washing Routine to Follow
● Pre-rinse every time
● Use a foam cannon if possible
● Wash top to bottom
● Never use circular motions
Drying Like a Detailer
Use a dedicated microfiber drying towel. Gently pat or drag (not rub!) across the surface. If you want to go extra pro, use a car dryer blower.
When to Seek a Professional
Sometimes DIY just won’t cut it.
Situations That Need Expert Help
● Deep scratches under the clear coat
● Super soft or repainted panels
● No experience using polishers
● Time constraints
If you’re unsure, a professional detailer can inspect the paint and advise whether it’s fixable or needs paint correction.
Final Thoughts
Swirl marks are like pimples on your car’s face—annoying but totally treatable. With the right tools, products, and some elbow grease, you can bring back that mirror finish and turn heads again. Remember: prevention is easier than correction. Wash smart, dry gently, and treat your car’s paint like you’d treat your own skin—with care.
FAQs
Q1: Can I remove swirl marks by hand?
Yes, but only if they’re light. For deeper marks, a machine polisher is more effective.
Q2: How often should I polish my car to remove swirls?
Only when needed—typically once or twice a year. Over-polishing can thin the clear coat.
Q3: Is waxing enough to hide swirl marks?
Nope. Wax can temporarily mask them with gloss, but won’t remove them.
Q4: Can ceramic coating prevent swirl marks?
Not fully. It can reduce the chance, but improper washing can still cause swirls—even with coating.
Q5: Are swirl marks permanent?
Not usually. If they’re in the clear coat, polishing can remove them. If they’re deeper, you’ll need professional help.